OIDC & Tableau Cloud
On this page
Overview#
This page explains how to use FusionAuth as an identity provider for Tableau Cloud using OpenID Connect (OIDC).
Prerequisites#
This document assumes you have:
- Admin access to an instance of FusionAuth
- Admin access to a Tableau Cloud application
Configure CORS In FusionAuth#
Before configuring OIDC for Tableau, make sure the OIDC Tableau origin is allowed for requests. In your FusionAuth dashboard, navigate to Settings -> System -> CORS and toggle on the Enable CORS switch. Then add the origin, which is the URL in your browser's address bar when you are logged in to Tableau. It is something like https://prod-ch-a.online.tableau.com or https://prod-usw-a.online.tableau.com. The format is typically: https://prod-{region}.online.tableau.com with an https://sso.online.tableau.com origin.
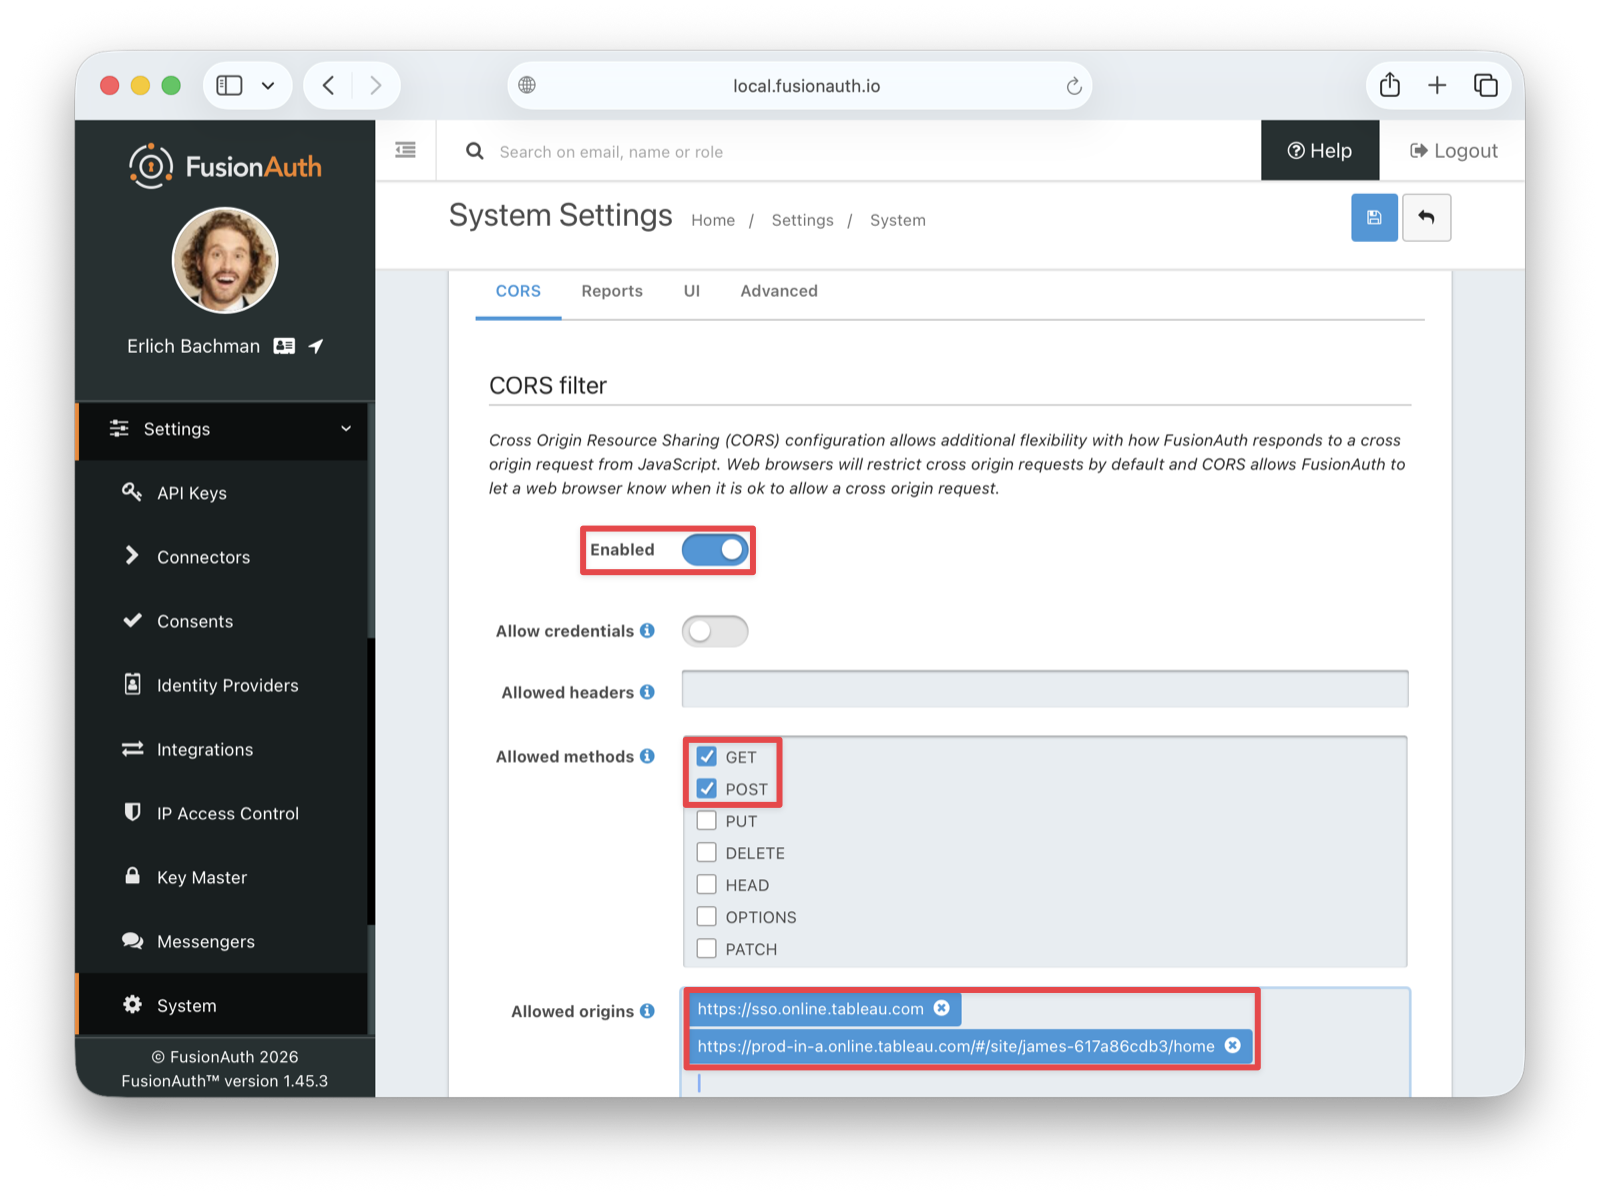
Under Allowed methods, enable both the GET and POST methods. Then save the changes.
Create An RS256 Signing Key#
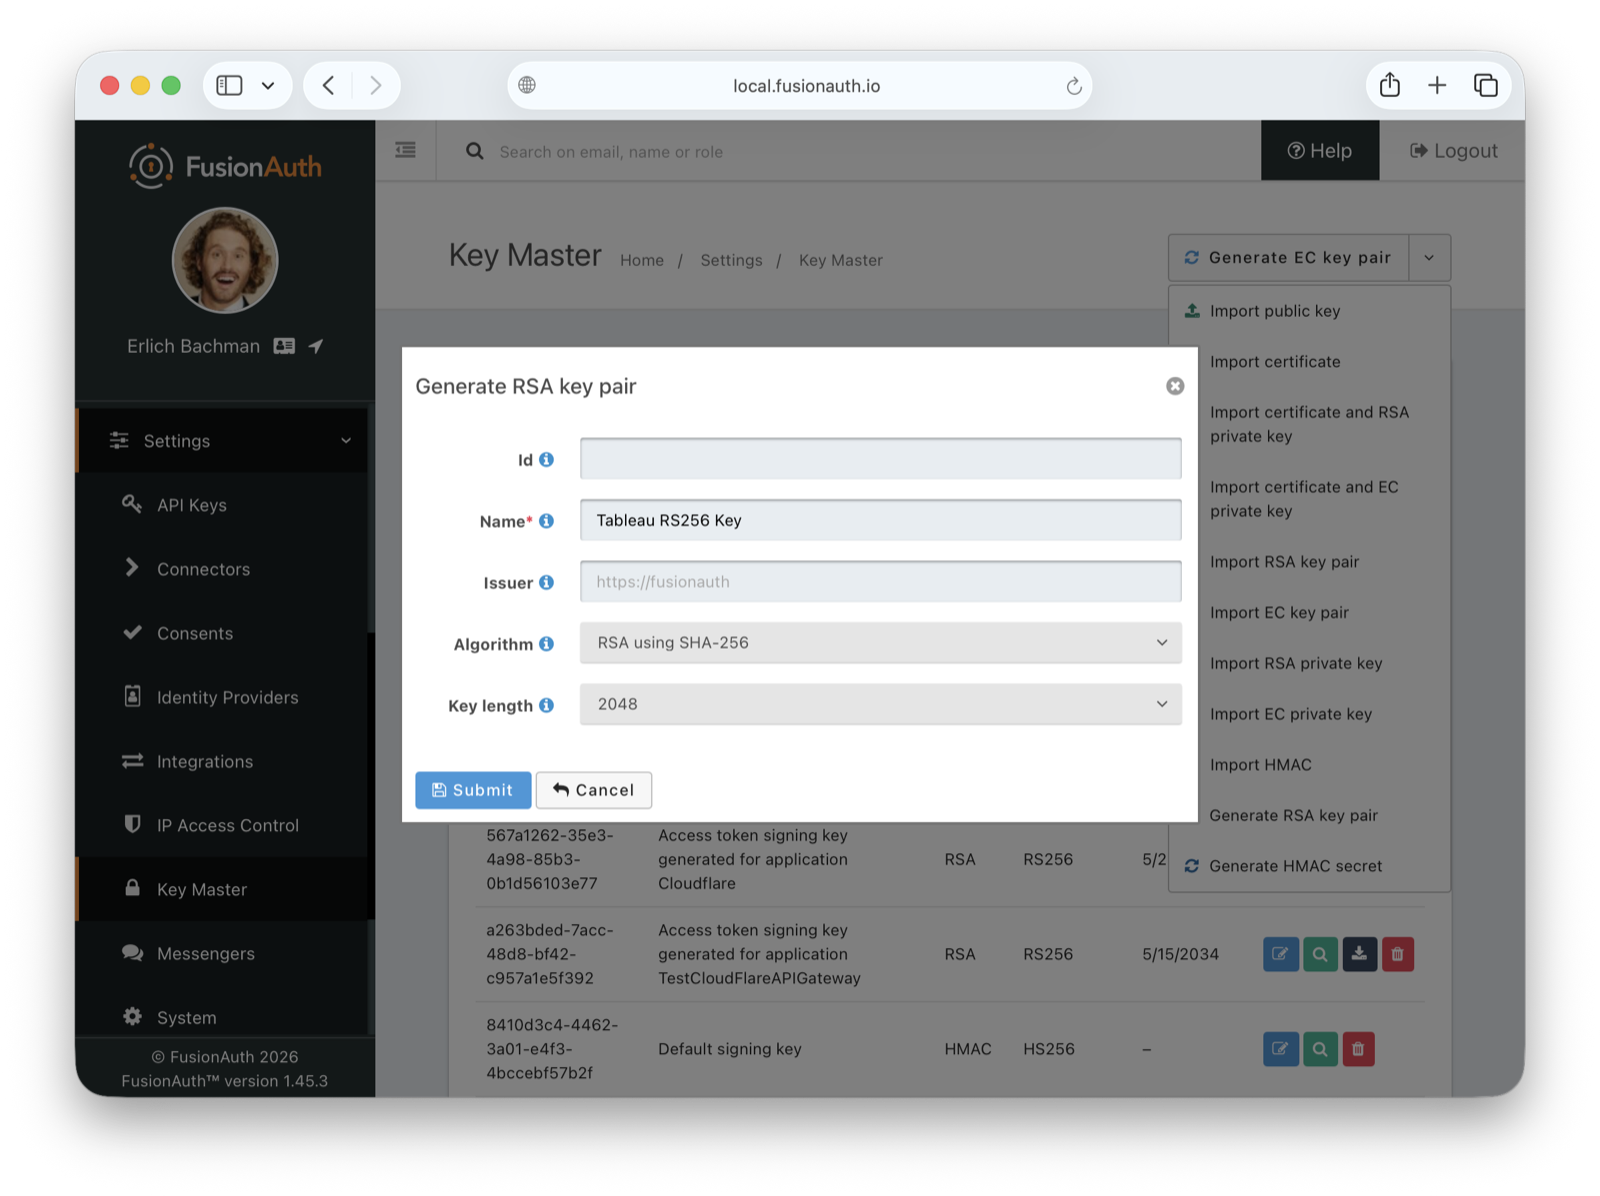
Tableau Cloud requires the RS256 algorithm for signing tokens, and RSA signatures with SHA-256. If you use any other algorithm, authentication will fail.
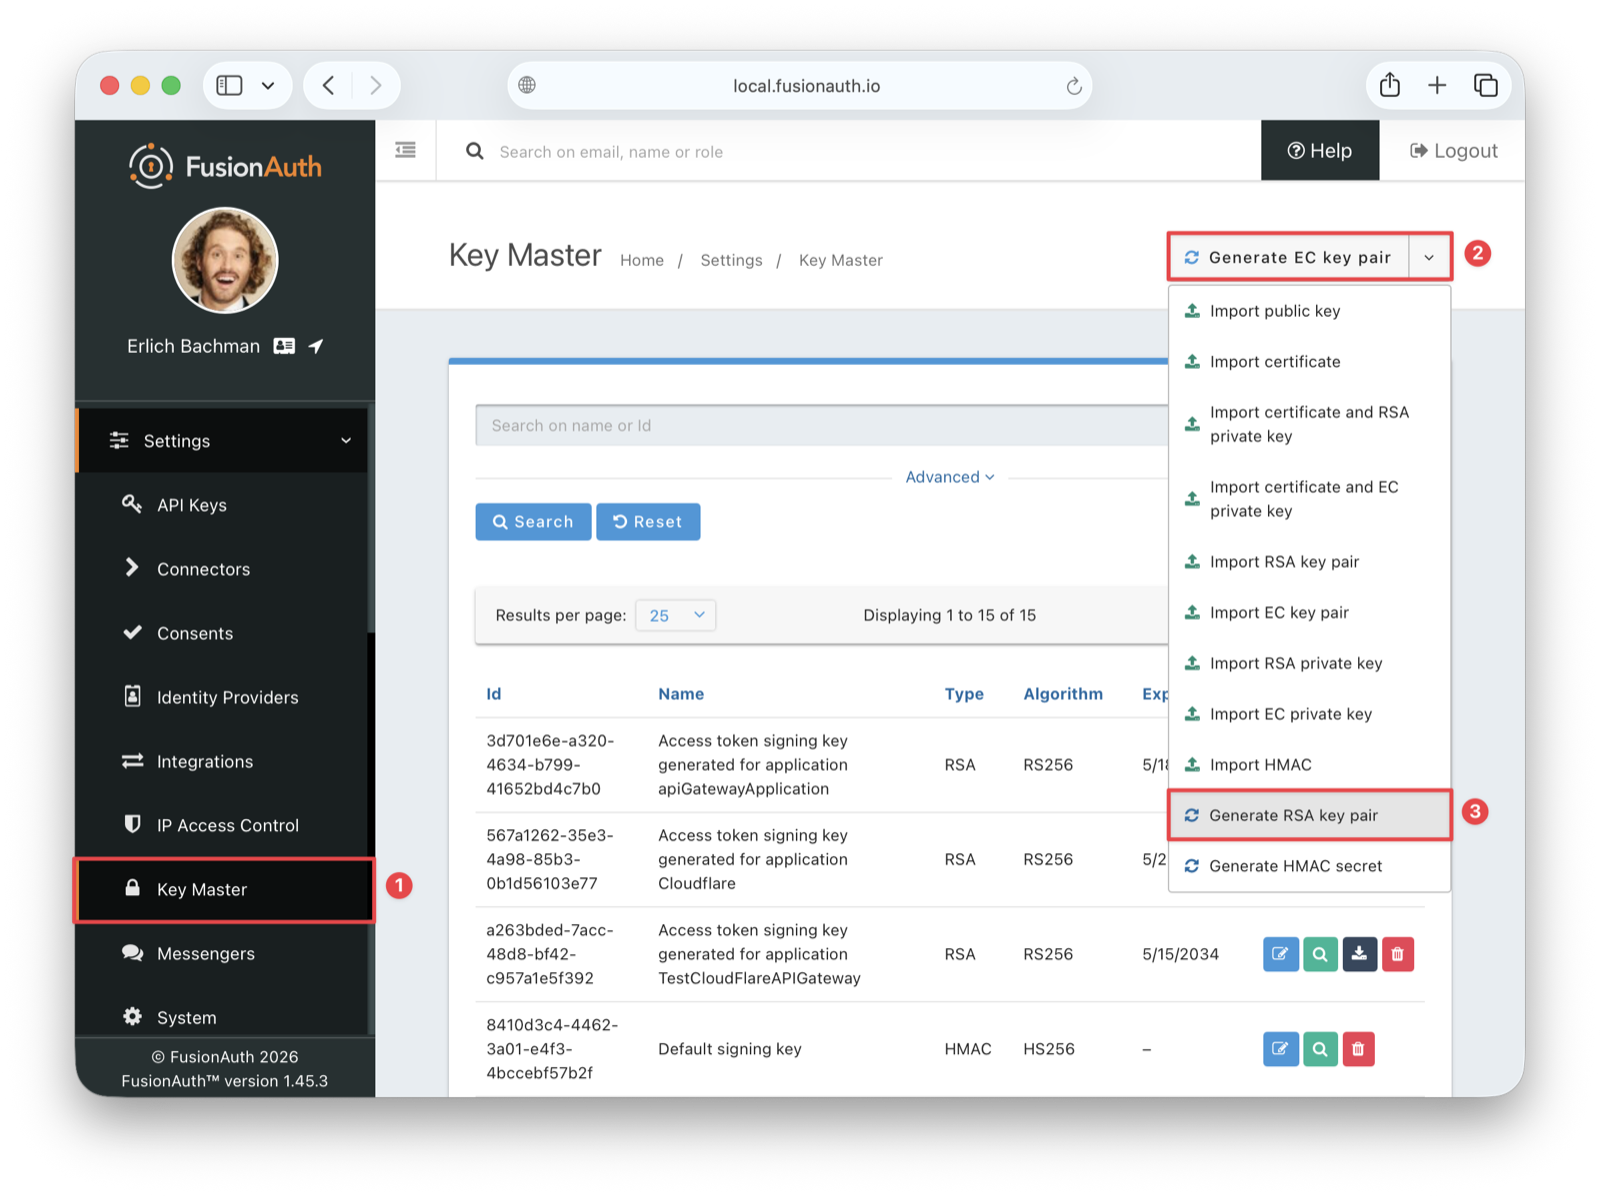
To create a new signing key, navigate to Settings -> Key Master , click on the Generate EC key pair dropdown button, and select the Generate RSA key pair option.
Enter a name such as Tableau RS256 Key for the name of the signing key and save the changes.
Create An Application#
In your FusionAuth dashboard, navigate to Applications in the sidebar, then click the + button in the top right to create a new application. Give it a memorable name, such as Tableau Cloud OIDC, and set the tenant you want to use.
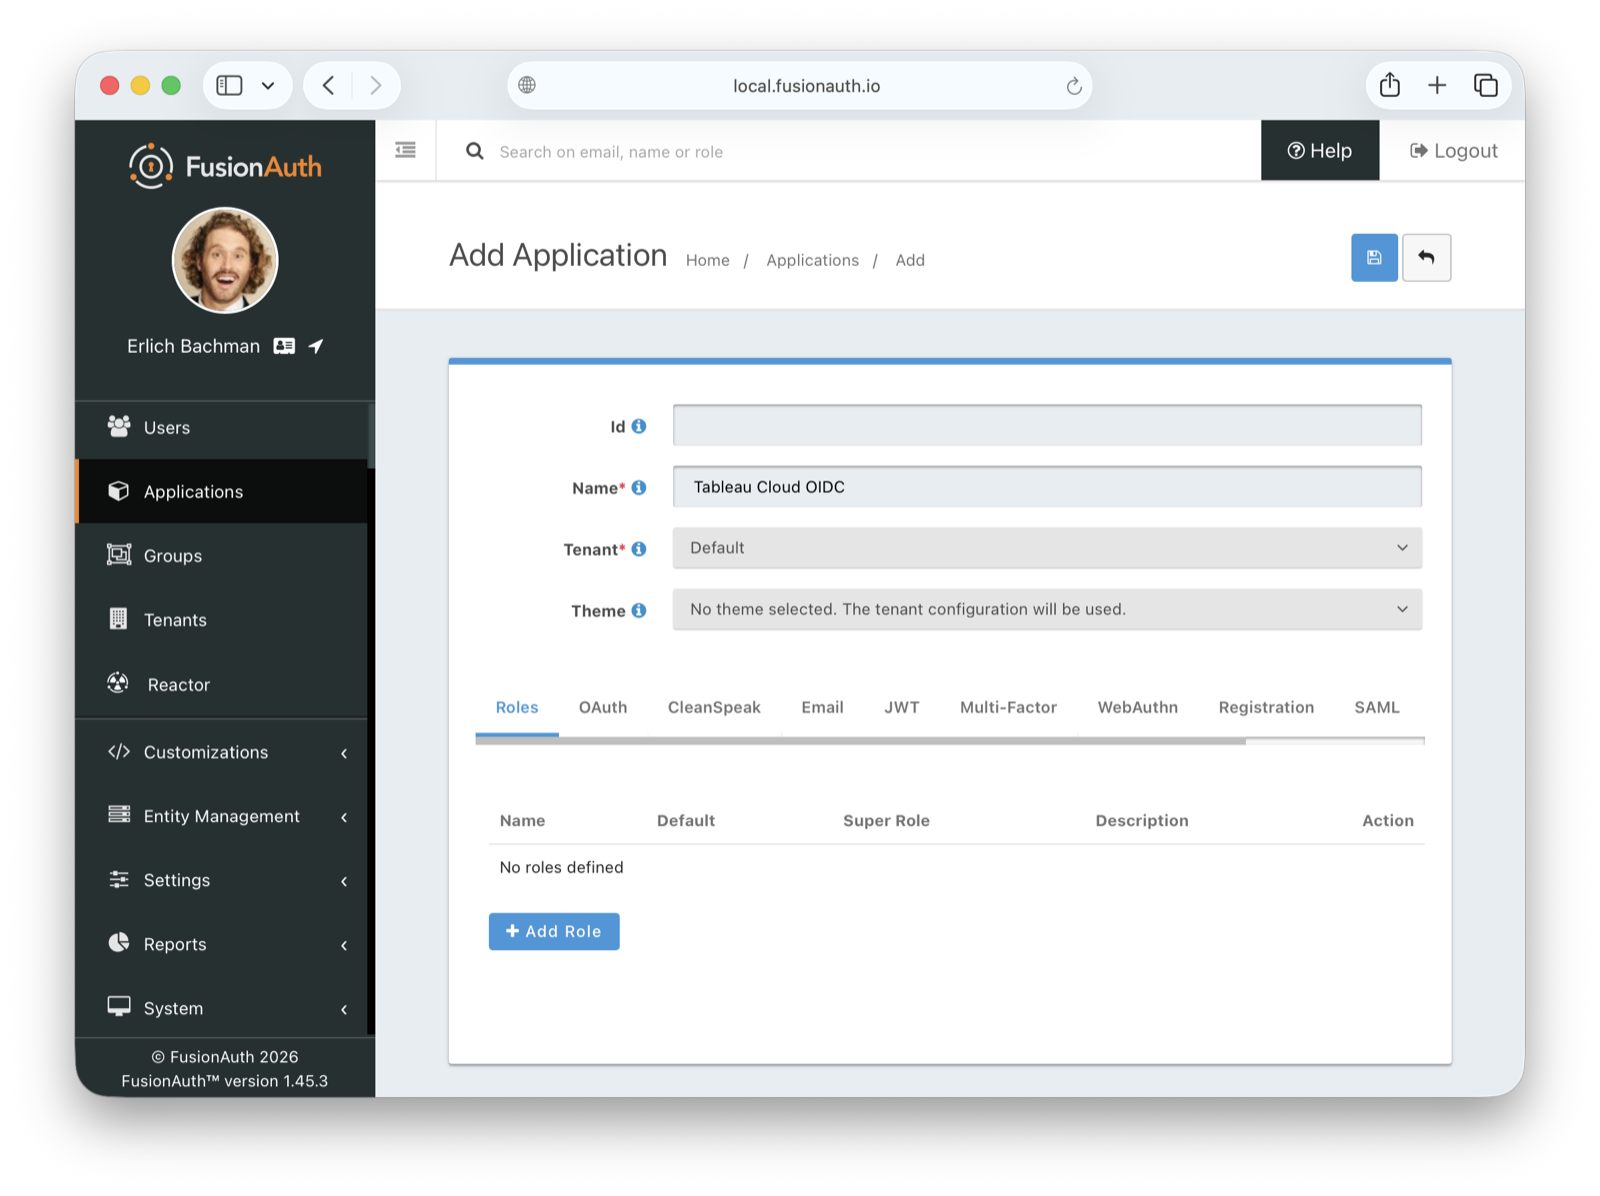
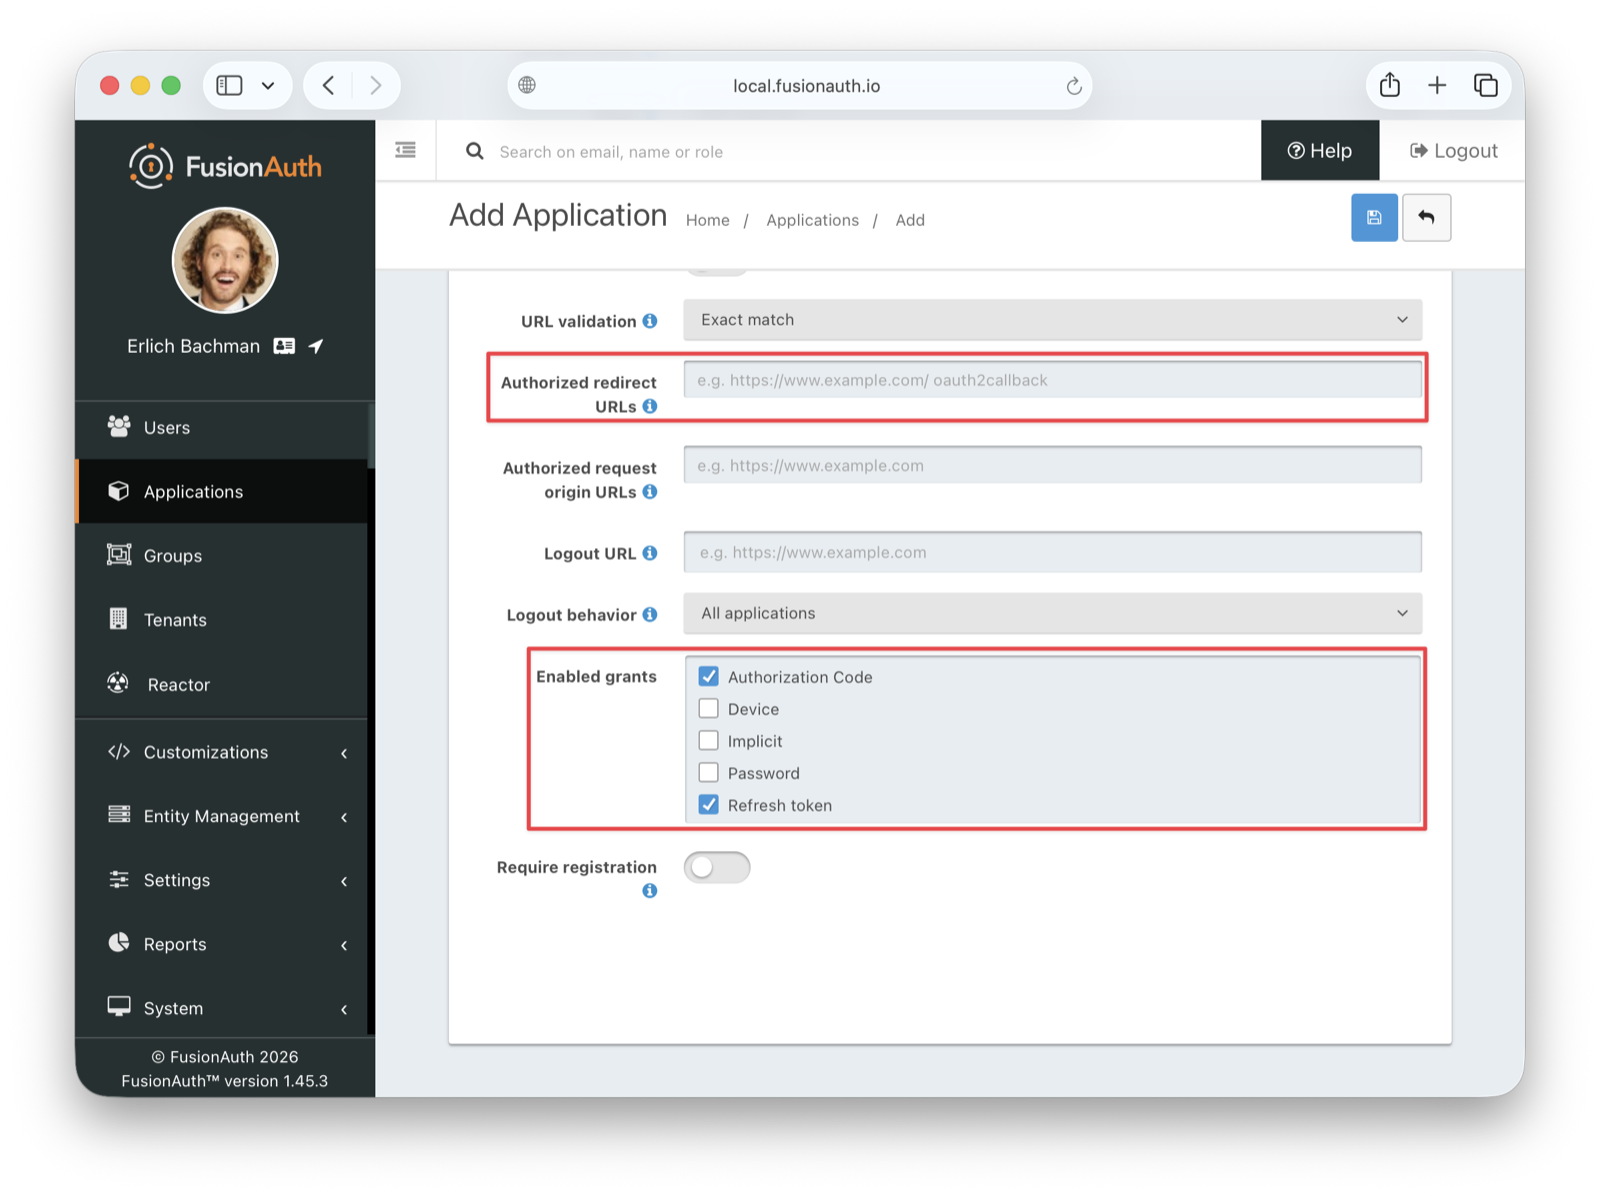
Before saving, navigate to the OAuth tab to configure the OAuth settings. Make sure the following conditions are met:
- Authorized redirect URLs is empty for now. You will retrieve its values from Tableau.
- Under Enabled grants, enable the following:
- Authorization Code
- Refresh Token
Configure JWT Settings#
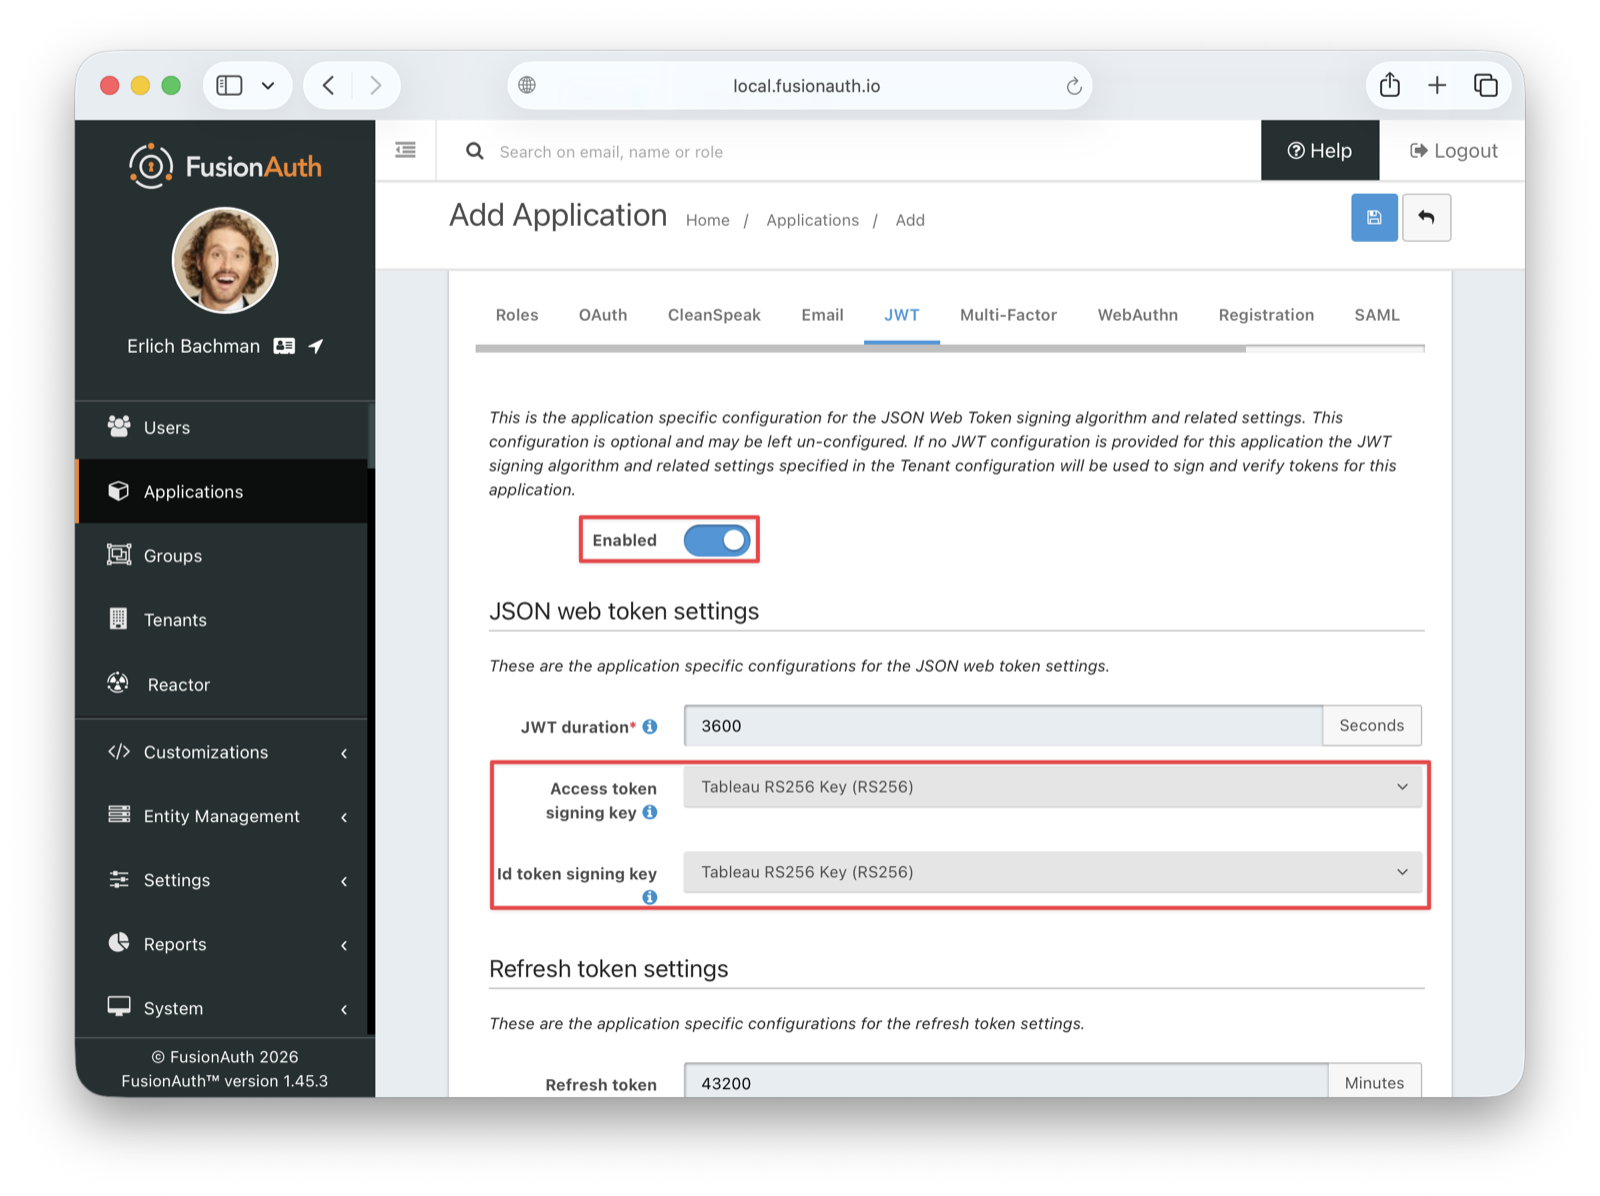
Before saving the application, also navigate to the JWT tab, enable JWT, and configure the following fields:
- Id token signing key: Select the RS256 key you created earlier, in this case
Tableau RS256 Key. - Access token signing key: Select the same RS256 key .
Save the application.
Retrieve Application Credentials#
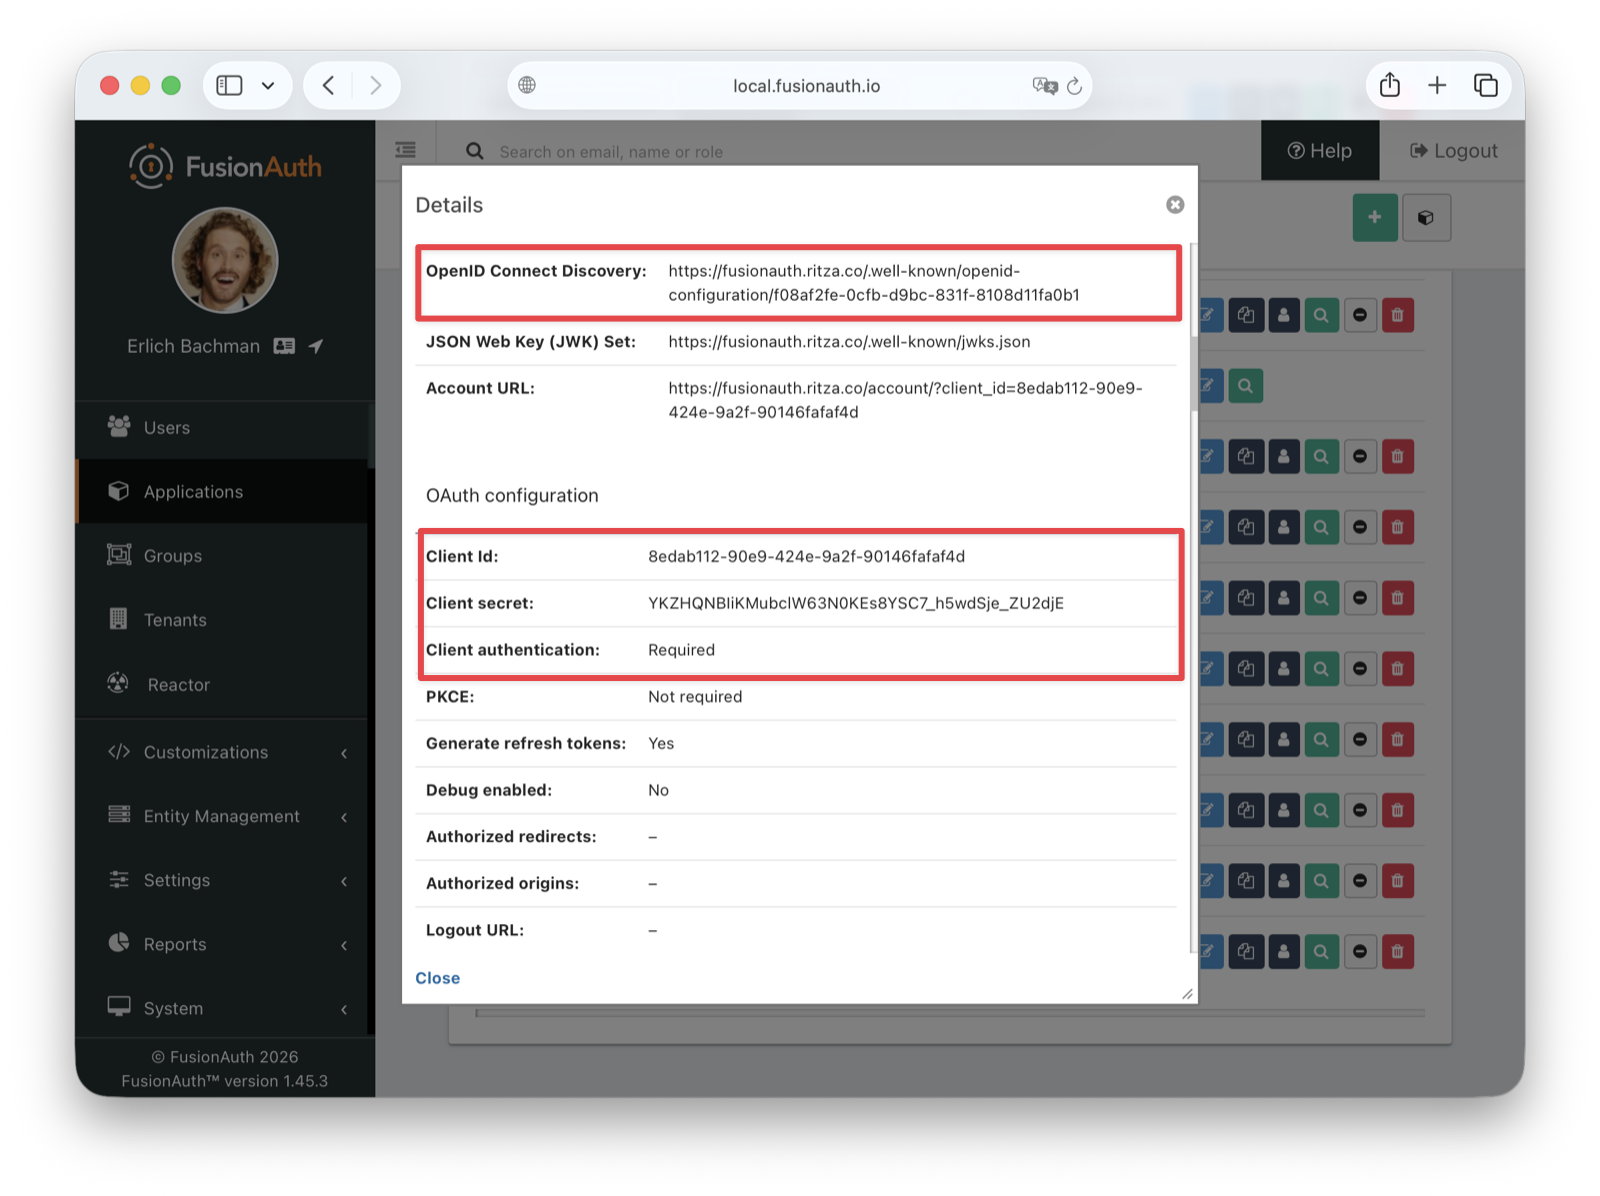
After saving, you're taken back to the Applications listing page. To view the application details, click the dropdown in the Action column for your Tableau Cloud OIDC application and select View . From the application details page, retrieve the following values, which you'll need for configuring Tableau:
- The Client Id in the OAuth configuration section
- The Client secret in the OAuth configuration section
- The OpenID Connect Discovery URL in the OAuth2 & OpenID Connect Integration details section
Configure Tableau Cloud#
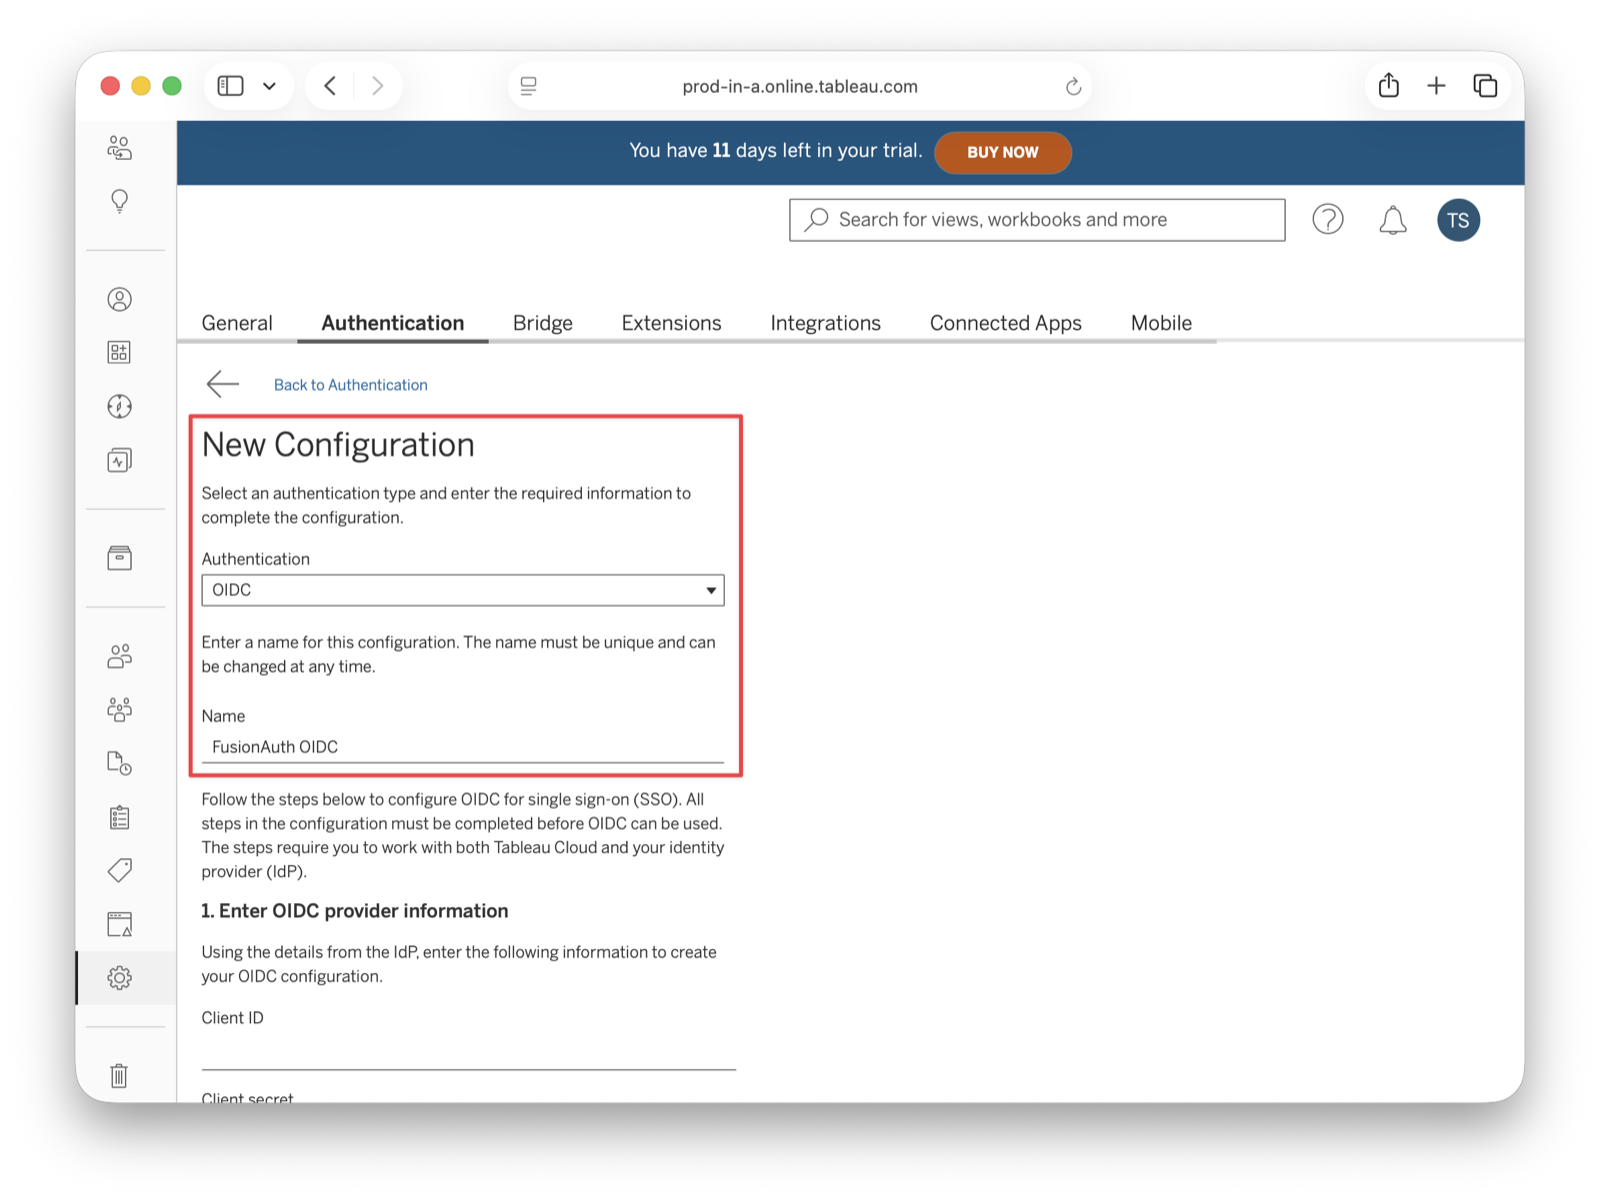
In the Tableau dashboard, navigate to Settings -> Authentication . Then, click on the New Configuration button and select OIDC for the authentication type and enter a memorable name for the configuration, such as FusionAuth OIDC.
Fill out the rest of the configuration form as follows:
- Client ID: Enter the Client Id you copied from FusionAuth.
- Client Secret: Enter the Client secret you copied from FusionAuth.
- Configuration URL: Enter the OpenID Connect Discovery URL from the FusionAuth application.
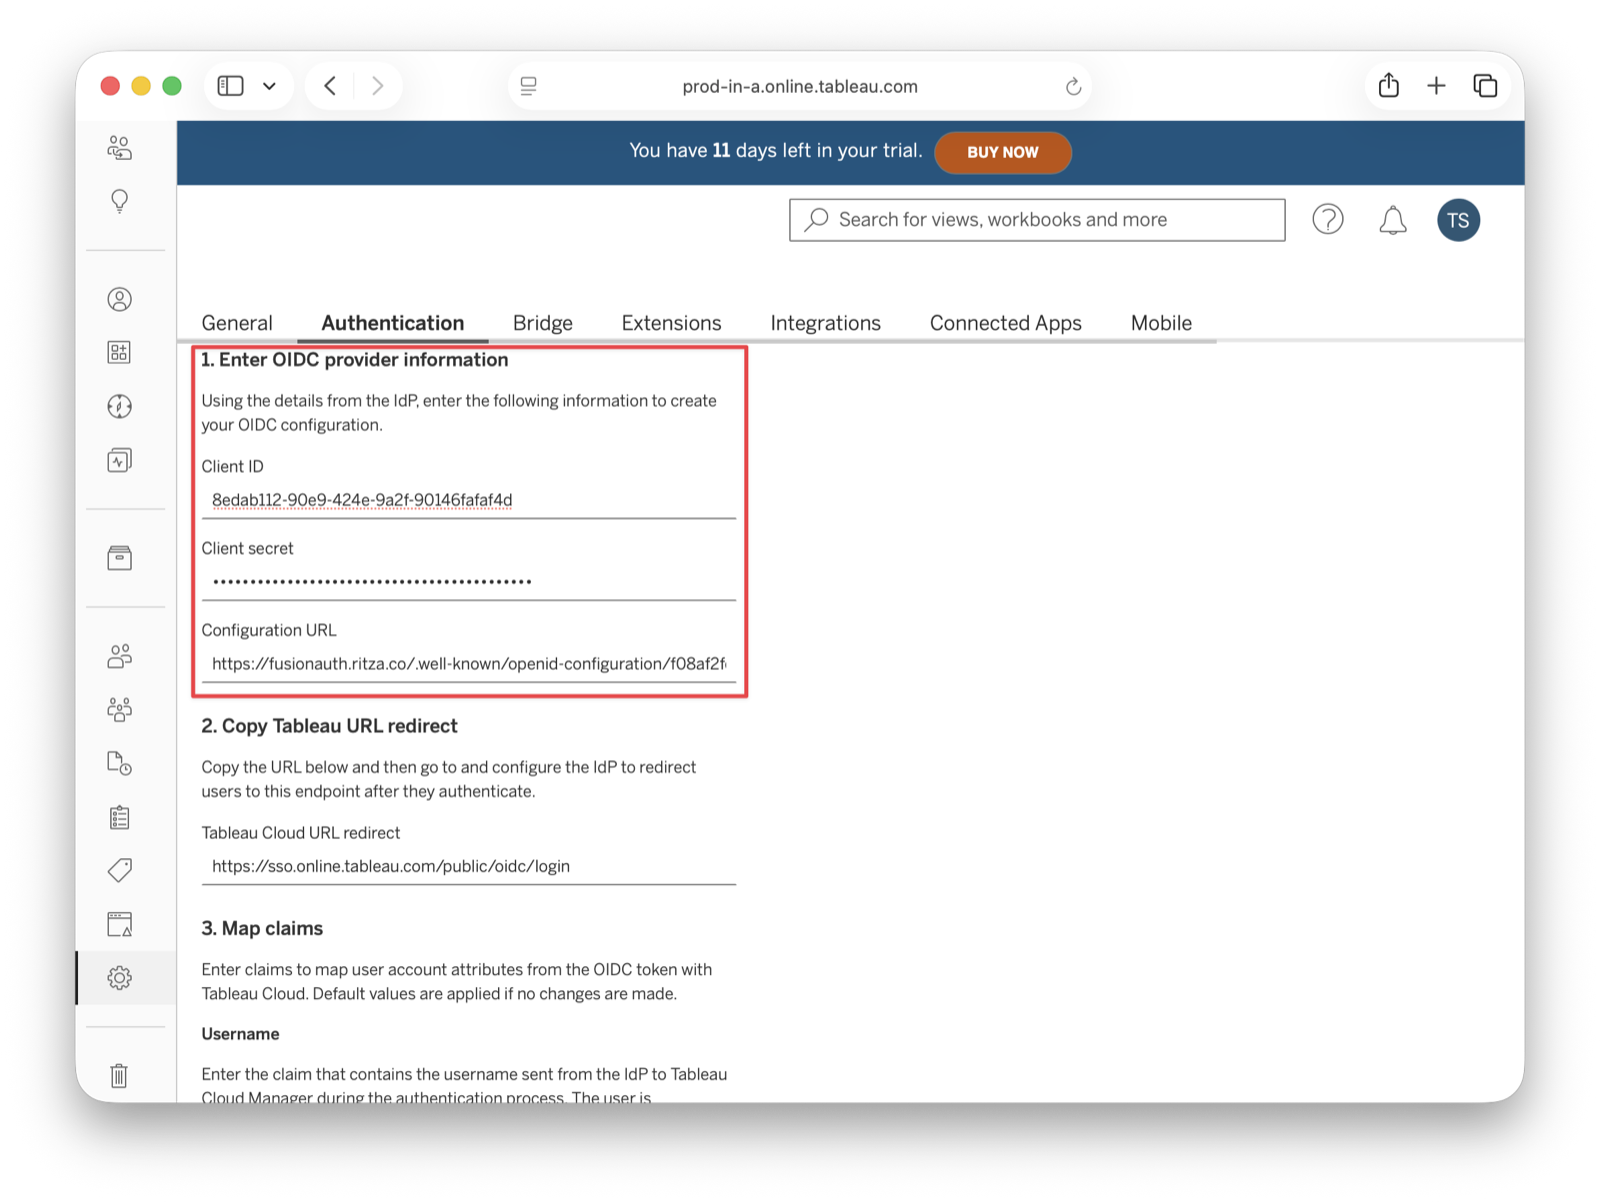
After entering the Client ID, Client Secret, and Configuration URL, scroll down to the section labeled 2. Copy Tableau URL redirect . You'll see a Redirect URL that looks like https://sso.online.tableau.com/public/oidc/login. Copy this URL. You need it to configure FusionAuth in the next step.
Update The FusionAuth Application With The Redirect URL#
Return to your FusionAuth dashboard and navigate to Applications . In the Applications listing, click the edit (pencil) icon in the action buttons for your Tableau Cloud OIDC application. Go to the OAuth tab and paste the redirect URL you copied from Tableau into the Authorized redirect URLs field. Save the application.
Configure Claims Mapping#
Return to Tableau Cloud and continue with your OIDC configuration. In the Claims mapping section, configure the following:
- Username: Enter
email. - Email address: Enter
email. - Name: Select the Given and family name radio button.
- Given name or first name: Enter
given_name. - Family name or last name: Enter
family_name.
- Given name or first name: Enter
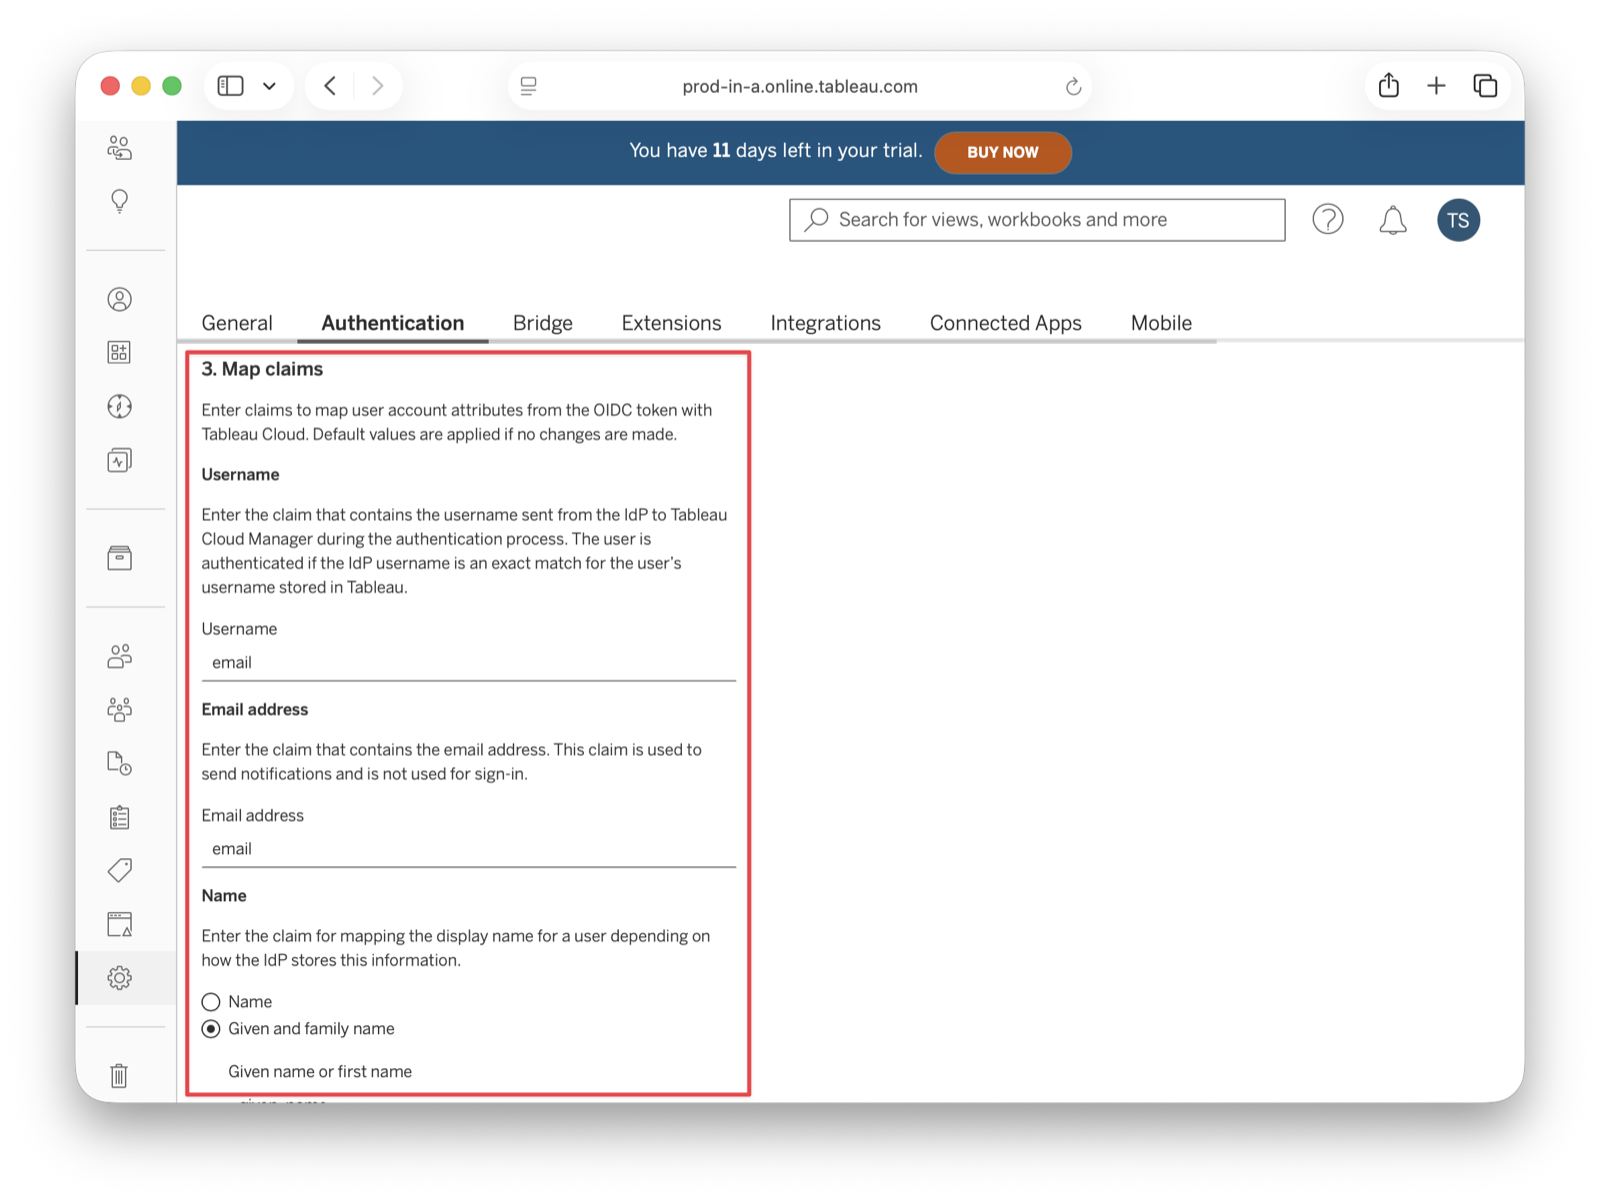
Save the changes.
Test The Configuration#
Create a new FusionAuth user account for testing purposes.
Click Test Configuration to open a modal with the FusionAuth login screen. Fill in your test user credentials and submit the form. You should see a Successfully connected to server message below that button.
Add A New User#
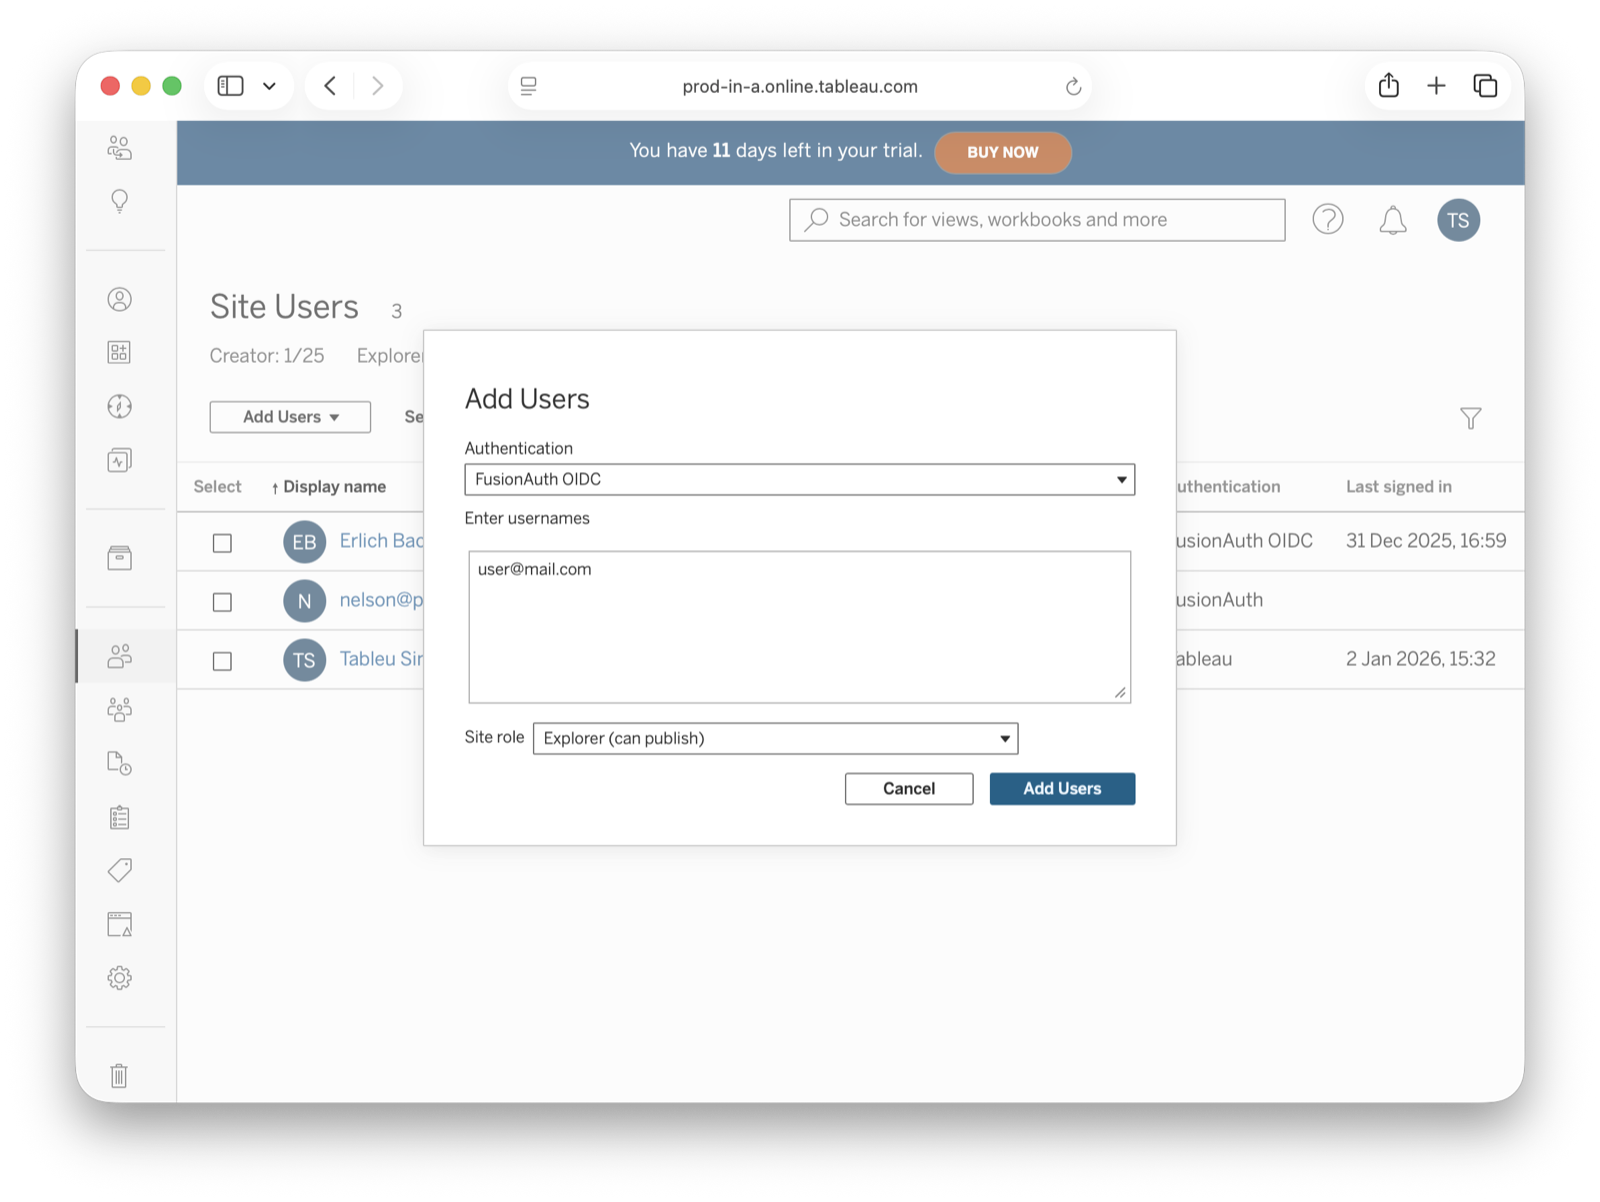
In your Tableau Cloud account, navigate to Users in the sidebar. Click the Add Users dropdown and select Add Users by Username . You must provide the same email addresses that users will enter to log in to your FusionAuth instance.
Now, those users should receive an email with a link to the login page.
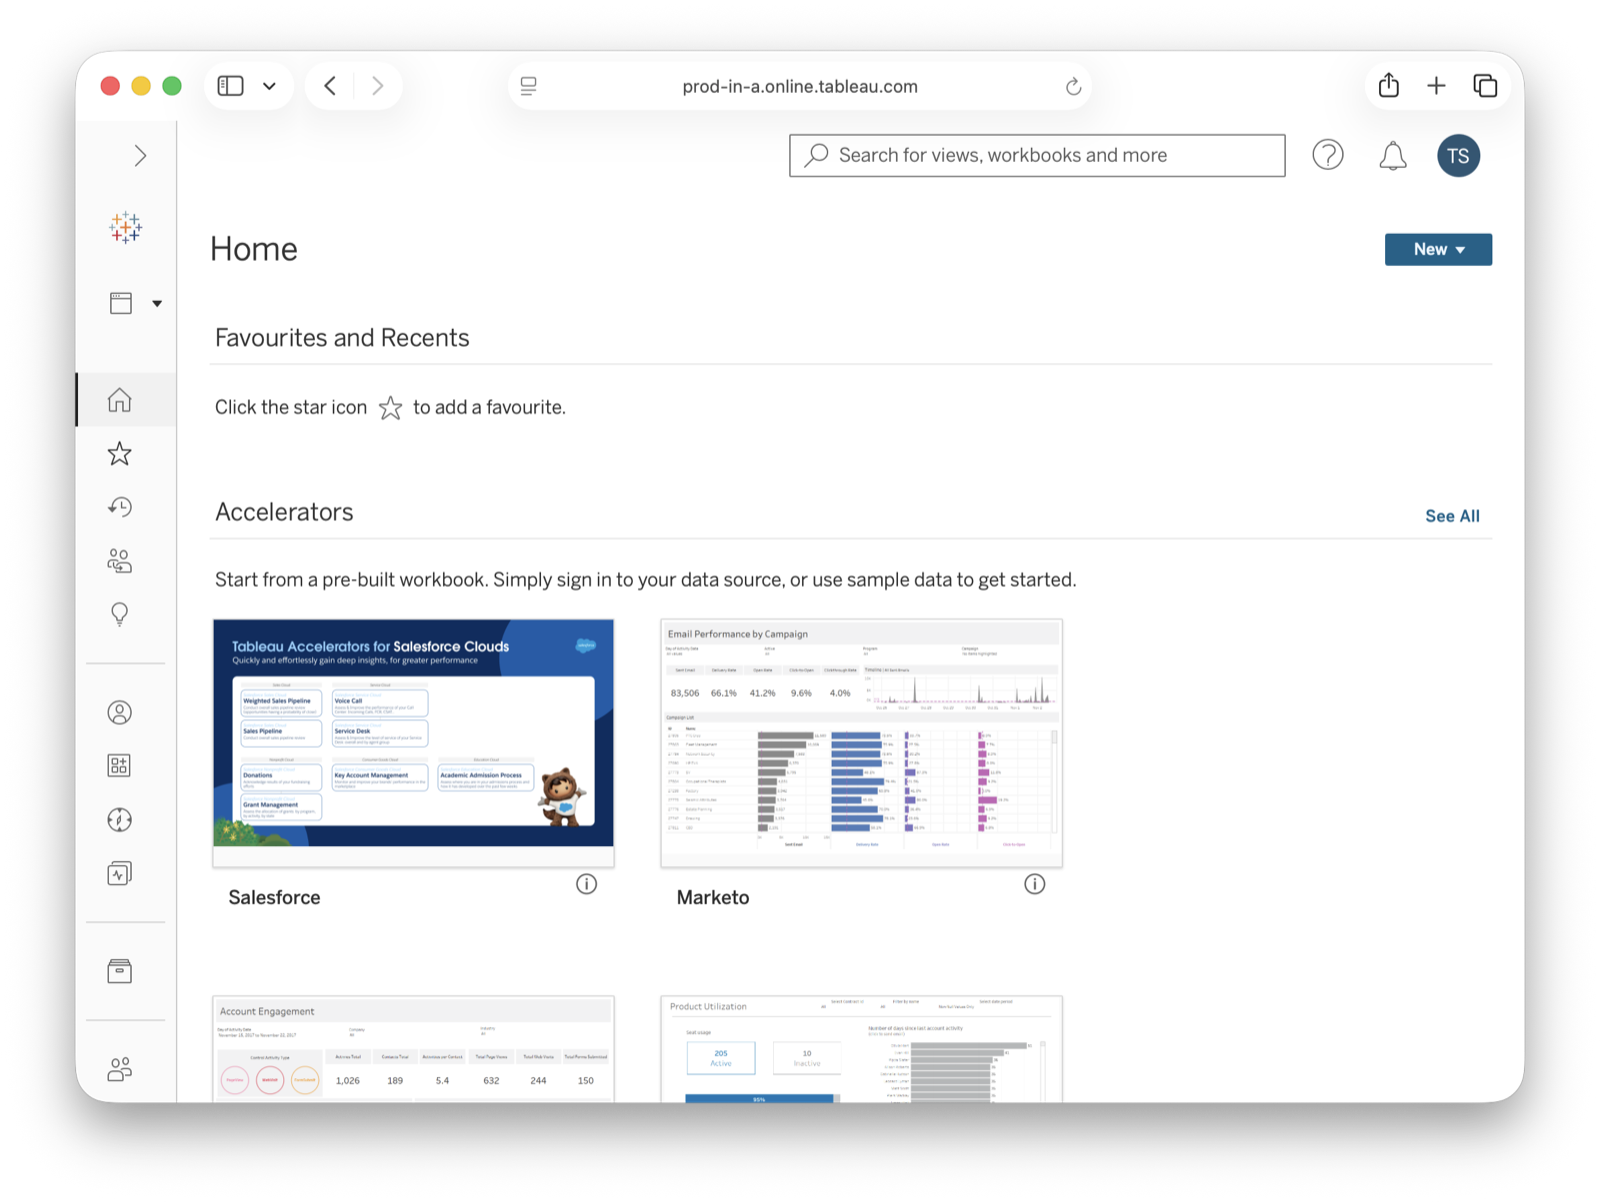
Users are redirected to the FusionAuth login screen when they click Sign in . There, each user fills in the credentials for their FusionAuth account. After users authenticate successfully, they are sent to the Tableau Cloud dashboard.
Troubleshooting#
Finally, you can edit your FusionAuth application. Go to the JWT and OAuth tabs and click Enable debug logging to create an event log with more information. To see these logs, browse to System -> Event Log .
You can also review the Tableau Cloud SSO docs.
Related
Learn how to set up CockroachDB to allow users to log in using FusionAuth via OIDC.
Learn how to set up Salesforce to allow users to log in using FusionAuth via OIDC.
Setting up Tableau Cloud to allow users to log in using FusionAuth via SAML v2.
Learn about the APIs for creating, retrieving, updating and deleting identity providers.